hpr3809 :: The Abominable Post Apocalyptic Podcast Player
Build a Three Dollar MP3 player in One Hour
Hosted by Mechatroniac on Thursday, 2023-03-09 is flagged as Explicit and is released under a CC-BY-SA license.
robotics, mp3, GPD2846A, GPD2846, DIY, arduino.
4.
Listen in ogg,
opus,
or mp3 format. Play now:
Duration: 00:19:54
Download the transcription and
subtitles.
Arduino and related devices.
In this series various contributors talk about how to use and program Arduino single-board microcontrollers and related devices.
See the Wikipedia article
https://en.wikipedia.org/wiki/List_of_Arduino_boards_and_compatible_systems for details of the range of devices.
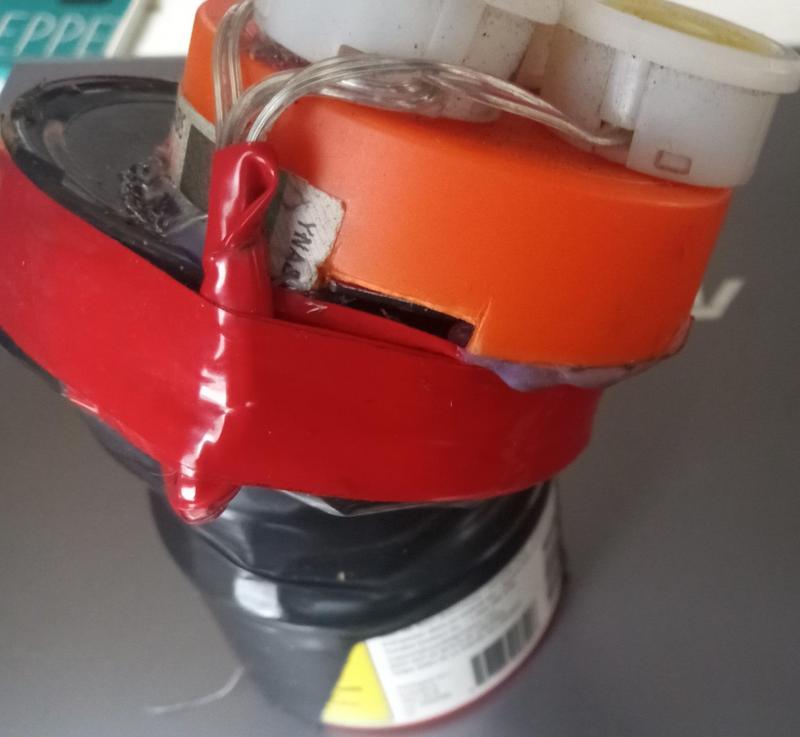
Notes: Forgot to mention that I hot glued the top lid (original lid for the 'speaker box'), on top of the boards. I had used the device with the top uncovered for a month because I hoped I would find a better choice but after getting tired of the wires detaching and worrying about the sdcard slot getting wrecked I decided to commit to glueing the lid on.
The boards are very robust, I dropped them in the snow a few times. They would stop working but after drying off would function.
I didn't find the datasheet with the resistance values for other values until after I glued the lid so will have to open it up again or get into one of the switch lines and do resistor combinations... now that I know more I think I should be able to control the mp3 player with one analog output pin from the arduino for all the functions, since it seems the pin 8 that all the switch resistors lead to detects voltage levels from the voltage divider created when one of the switches goes to ground.
The robot is using 4 lines right now for mp3 control. Would be cool if I could free up 3 more but I don't remember if any of them are occupying an analogue slot.
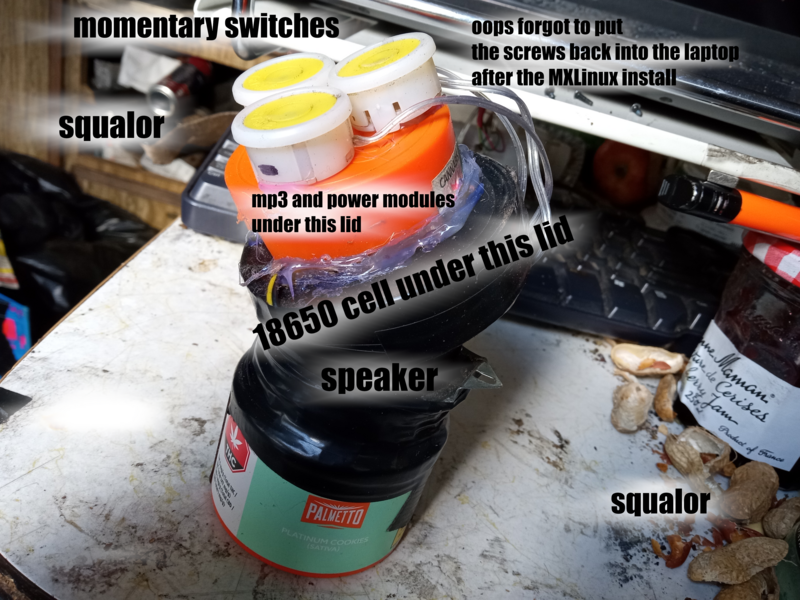
No power button! None needed. Pause and unpause via momentary switch. The charger board can charge from micro usb or usb-c and will protect your 18650 cell from running flat and damaging itself.
Check out my robots: https://bitchute.com/channel/mechatroniac
Post Apocalyptic Robotics Database Entry:
HH000000000
H Hybrid: Denotes some prepurchased or hard to find components
H Human use: For use by biological humans
Tools and supplies
- multimeter - not strictly required but highly recommended
- Soldering iron
- solder(thinner solder wire works better for electronics)
- wire stripper
- hot glue gun
- electric or duct tape
- side cutters/cutting pliers/aircraft snips
Buy:
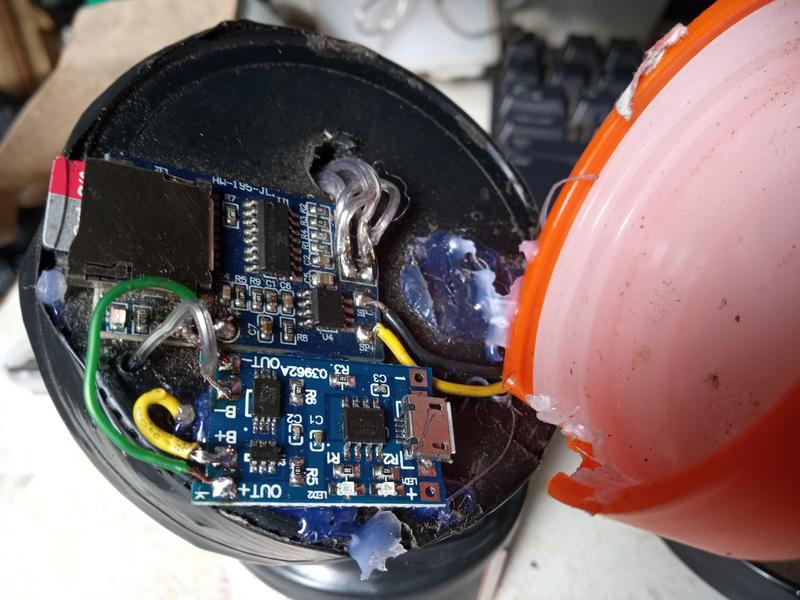
1s 18650 charger board
https://www.aliexpress.us/item/2251832744326141.htmlGPD2846A TF Card MP3 Decoder Board 2W Amplifier
https://www.aliexpress.com/item/4000188516180.html
https://www.aliexpress.com/item/32968306923.html
Find or Buy:
short lengths of wire
4 ohm speaker (can be found in old tvs)
momentary switches(3) - can be found in vcrs, tvs, dvd players...
18650 cell
3.5g weed jar or similar + lid
larger lid
(optional)
You should consider getting an arduino or a kit
Keyestudio Basic Starter Kit V2.0 With UNO R3 Board Or Mega 2560 R3 Board
https://www.aliexpress.com/item/1005004961819902.htmlGPD2846A datasheet
https://pdf1.alldatasheet.com/datasheet-pdf/view/1132627/ETC2/GPD2846A.html
https://datasheetspdf.com/pdf-file/949393/Generalplus/GPD2846/1
Picture 1 - shows the slit in the lid where the sdcard resides. Sdcard and slot are protected from being bumped by the strategically placed, glued lid

Click the thumbnail to see
the full-sized image
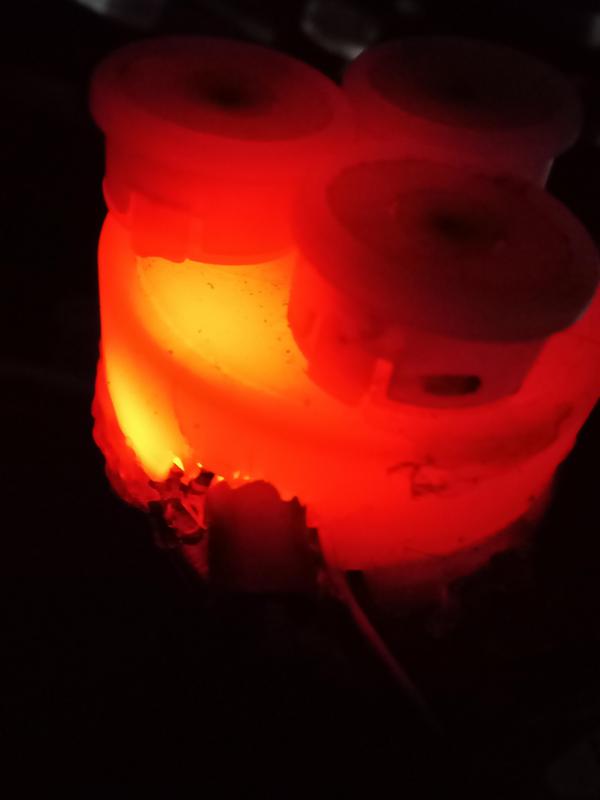
Picture 2 - shows charging, microusb cord is coming in from the bottom, LED on charging board illuminates brightly

Click the thumbnail to see
the full-sized image
Picture 3 - shows both boards glued to bottom lid, with the top lid off

Click the thumbnail to see
the full-sized image
